👤 Who This Is For
Working professionals who want to automate repetitive tasks using AI — but have no coding experience and don’t know where to start. No developer required. No technical background needed.
⚡ What You’ll Build
By the end of this guide you will have a working AI-powered workflow that automatically captures a new contact, uses AI to write a personalised follow-up email, and logs everything to a spreadsheet — running on its own, without you touching it.
Time to complete: approximately 45 minutes. Tools required: Zapier free account, Google account. No credit card needed to start.
The most common reason professionals don’t automate their work isn’t a lack of interest. It’s not knowing where to start. The tools feel technical. The terminology is unfamiliar. And most tutorials assume you already know what you’re doing.
This guide assumes nothing. It walks you through building a real, working AI workflow from scratch — step by step — using Zapier, the most beginner-friendly automation platform available. By the time you finish, you will have something useful running in the background of your work life, and you will understand how to build more.
We will use Zapier’s free tier and Google Sheets for this walkthrough. Both are free. Both work immediately. No subscriptions required to complete this guide.
What You’re Building — and Why It Matters
Before touching any tool, it helps to understand the workflow you’re about to build and why it’s a good first project.
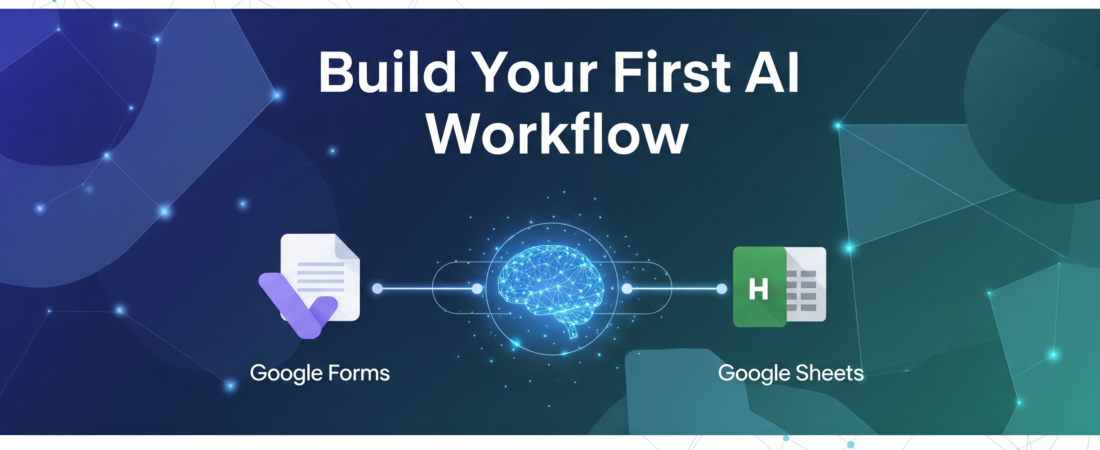
🔄 Your First AI Workflow — Overview
Trigger — Someone fills in a contact form
A new entry appears in a Google Form. This is what starts the entire workflow automatically.
AI Step — Write a personalised follow-up email
Zapier passes the contact’s name and message to AI, which writes a tailored response draft — not a template, an actual personalised email.
Log — Add the contact to a Google Sheet
The contact’s details and the AI-drafted email are saved to a spreadsheet automatically — your running record of every enquiry.
Result — You review and send when ready
You come back to a drafted email and logged contact. The AI did the work. You make the final call.
This workflow is a good first project because it has a clear trigger, produces a useful output, involves an AI reasoning step, and is relevant to almost any professional role. Once you understand how this works, you can apply the same pattern to dozens of other tasks.
What You Need Before Starting
Google account
For Google Forms and Google Sheets — free with any Gmail address
45 minutes
Set aside uninterrupted time — it’s easier to build in one sitting than to stop and restart
No coding needed
Every step uses Zapier’s visual interface — if you can use a web form, you can build this
Three Concepts to Know Before You Build
Zapier uses specific terminology. Understanding these three terms will make every step of this guide immediately clear.
| Term | What It Means | In This Workflow |
|---|---|---|
| Zap | An automated workflow — the whole thing from trigger to final action | The entire form → AI email → spreadsheet sequence |
| Trigger | The event that starts the Zap — something happens in an app | A new Google Form submission arrives |
| Action | What Zapier does in response — can be in any connected app | Generate AI email draft, then add row to Google Sheet |
A Zap always follows the same pattern: one trigger starts it, then one or more actions follow. The AI step is just one type of action — the one that adds reasoning to the workflow instead of just moving data.
Step-by-Step: Building Your First AI Workflow
Phase 1 — Set Up Your Google Form and Sheet (10 minutes)
Before building in Zapier, you need the two Google tools that will feed and receive data from your workflow.
Create your Google Form
- Go to forms.google.com and click Blank form
- Give it a title — something like “Contact Us” or “New Enquiry”
- Add three fields: Name (Short answer), Email (Short answer), Message (Paragraph)
- Click the Responses tab at the top, then click the green spreadsheet icon — this creates a linked Google Sheet automatically
- Name the spreadsheet something clear like “Contact Form Responses”
- Submit one test response using your own name and email — you will need this data in the next phase
Phase 2 — Create Your Zap in Zapier (20 minutes)
Set up the trigger
- Log in to zapier.com and click + Create → Zaps
- In the trigger step, search for and select Google Forms
- Choose the event “New Form Response”
- Connect your Google account when prompted — click Sign in with Google
- Select the form you just created from the dropdown
- Click Test trigger — Zapier will find your test submission and show you the data fields (Name, Email, Message)
- Confirm the test data looks correct and click Continue
Add the AI action — generate the email draft
- Click + to add the first action step
- Search for “AI by Zapier” — this is Zapier’s built-in AI tool, no external API key needed
- Select the event “Generate Text”
- In the User Prompt field, type your instruction to the AI. Use this template — replacing the bracketed parts with the data fields from your trigger:
Name: [insert Name field from trigger]
Message: [insert Message field from trigger]
- To insert the trigger data fields, click the + icon inside the prompt field and select Name and Message from the dropdown — Zapier will insert them as dynamic variables
- Click Test step — you will see the AI generate a real email draft using your test submission data
- Review the output. If it looks good, click Continue
Add the second action — log to Google Sheets
- Click + to add a second action step
- Search for and select Google Sheets
- Choose the event “Create Spreadsheet Row”
- Connect your Google account (or select it if already connected)
- Select your spreadsheet (“Contact Form Responses”) and the correct sheet tab (usually “Sheet1” or “Form Responses 1”)
- Map the columns — click into each column field and select the matching data from your earlier steps:
- Name column → Name (from trigger)
- Email column → Email (from trigger)
- Message column → Message (from trigger)
- Add a new column called “AI Email Draft” → Output (from AI by Zapier step)
- Add a new column called “Date” → Today’s date (Zapier has a built-in date field)
- Click Test step — check your Google Sheet to confirm a new row appeared with all the data
- Click Continue
Phase 3 — Turn It On (2 minutes)
- Click Publish in the top right corner of the Zap editor
- Give your Zap a clear name — something like “Contact Form → AI Email Draft → Log”
- Toggle the Zap to On
- Submit another test entry through your Google Form using a different name and message
- Wait 1-2 minutes, then check your Google Sheet — a new row should appear with an AI-drafted email response tailored to that specific message
🎉 Your workflow is live.
From this point forward, every new form submission will automatically trigger the AI to write a personalised response and log everything to your spreadsheet — whether you’re at your desk or not. You just built your first AI workflow.
What to Do With the Output
The workflow produces a drafted email in your Google Sheet — not an email that gets sent automatically. This is intentional for a first workflow. You review the draft, make any edits, and send it yourself. Human in the loop at the final step.
As you get comfortable, you can extend this workflow to send the email automatically via Gmail — adding a third action step that uses the AI output as the email body. But starting with a review step is good practice when you’re learning. It lets you verify the AI output before it reaches a real person.
Five More Workflows to Build Next
Once this workflow is running reliably, you have the pattern to build almost anything. Here are five workflows that follow the same trigger → AI step → action structure and are useful for most professionals.
📧 Email Summariser
Trigger: New email arrives in Gmail with a specific label. AI step: Summarise the email and extract action items. Action: Add summary to Notion or Google Docs.
Tools: Gmail + AI by Zapier + Notion
📝 Meeting Notes to Tasks
Trigger: New meeting transcript saved by Fireflies or Otter. AI step: Extract action items and owners. Action: Create tasks in Asana or Notion.
Tools: Fireflies + AI by Zapier + Asana
📱 Social Post Generator
Trigger: New blog post published on your WordPress site. AI step: Write three social media captions (LinkedIn, X, newsletter). Action: Save drafts to a Google Doc.
Tools: WordPress + AI by Zapier + Google Docs
🔔 Daily Briefing
Trigger: Schedule (every weekday at 8am). AI step: Pull yesterday’s tasks and summarise priorities for today. Action: Send yourself a Slack or email briefing.
Tools: Schedule + Google Sheets + AI by Zapier + Slack
📊 Lead Classifier
Trigger: New lead in your CRM or form. AI step: Classify the lead as high/medium/low based on their details. Action: Route to the right pipeline stage or team member.
Tools: HubSpot + AI by Zapier + HubSpot or Slack
Common Problems and How to Fix Them
⚠️ “No data found” on trigger test
You haven’t submitted a test response to your Google Form yet. Submit one with real text and run the test again.
⚠️ AI output is too generic
Your prompt needs more detail. Be specific about tone, length, and what to include. The more context you give the AI, the better the output.
⚠️ Google Sheets row didn’t appear
Check that you selected the correct spreadsheet and sheet tab. Also confirm the Zap is turned On — drafts don’t run.
⚠️ Zap ran but no new data appeared
Free Zapier accounts check for new triggers every 15 minutes. Wait 15 minutes after your test form submission before checking the sheet.
Going Further — When You’re Ready
This guide used Zapier’s free tier and the built-in AI by Zapier tool to keep things simple. As your confidence grows there are two natural next steps:
More powerful AI: Connect Claude or ChatGPT directly to your Zapier workflows via their API for more sophisticated reasoning steps. Our Best AI Agents roundup covers which tools work best for different workflow types.
More complex workflows: When you outgrow Zapier’s free tier or need multi-branch logic, Make.com at $9/month gives you significantly more power per dollar. For technical professionals who want no execution limits and full customisation, our n8n review covers the self-hosted option.
📋 Key Takeaways
- An AI workflow follows a simple pattern: trigger → AI reasoning step → action. Everything else is a variation on this.
- Zapier’s free tier and built-in AI by Zapier tool are enough to build a genuinely useful workflow with no coding and no paid subscriptions.
- The AI step is what separates this from basic automation — it doesn’t just move data, it reasons about it and produces something new.
- Start with one workflow on one repeatable task. Get it running reliably before building more.
- The hardest part is starting. The second workflow takes a fraction of the time the first one did.
📚 Related Articles
- What Are AI Agents? A Plain-English Guide for Professionals
- Best AI Agents for Professionals in 2026: Tested and Ranked
- Zapier vs Make.com: An Honest Comparison for Working Professionals
- n8n Review 2026: The Most Powerful Automation Tool for Technical Professionals
- Claude AI Review 2026: Is Anthropic’s AI the Best Tool for Professionals?
- AI Tools Directory — Browse All Reviews
Ready to explore more AI tools for your workflow?
Browse our full directory — every tool tested and organised by use case and skill level.
Browse the Directory →